Saturday, December 20, 2014

MORE CHRISTMAS DECORATING WITH NATURAL ELEMENTS

DECORATING WITH NATURAL ELEMENTS

Here are a few more simple ideas for decorating that use more natural looking and simple greenery.....
Unfortunately, I am allergic to REAL evergreens, so I tend to use the artificial. You could use either...

GRAPEVINE WREATH
 Here I took a grapevine wreath and filled it in with some pine cone picks, poinsettias and grape leaves. Since there are gold touches in the decorations I used a little gold glitter paint and brushed some on the grape leaves, then added a gold sheer ribbon to complete the look! You can use thin wire or hot glue to attach your decorations to the wreath. Very easy and simple to do...

CHRISTMAS DECOR BASKET
 Here I took a plain basket I had lying around, filled it with sprigs of greenery, Christmas picks, then added a glittery Christmas ribbon to complete this easy, simple look! The basket could be used as a centerpiece on your coffee table or dining table.....

Merry Christmas and Happy New Year.... may all your craft dreams come true!!

Tuesday, December 2, 2014

IT'S CHRISTMASTIME!! DECORATING WITH NATURAL ELEMENTS....

CHRISTMAS 2014 DECORATING IDEAS!!

 Sorry for the long hiatus, very busy with work, vacation and finishing my Master's degree!

Now I can get back to my crafting, holiday decorating and having more fun!!

My theme this year is simple, using more natural materials and plain greenery. But I also love snowmen and they are part of the same "outdoorsy" theme. 

Take a look.......

I have a lovely antique cherry dining room set that I normally keep covered, but this year wanted to show off the lovely finish. I found a simple, inexpensive plaid runner (only cost $1.80, part of a Thanksgiving decor 70% off sale) that has gold, greens and reds. Then I placed a few bottle brush trees as my centerpiece. Simple yet elegant!!

Another one of my decorating pieces is made from pine cones. I have to admit I did not make this, my creative sister did.


I placed the pine cone tree on a gold chaser plate and voila! Instant au naturale decorating!

Here's a few more things I've used this year...

 Now, my tree this year is very tall and I wanted to showcase some of the more natural elements in the ornaments. Most are made of wood, wire, metal, pine cones, cloth and wicker. 


For the tree topper I used a star made from pine cones!!!

Hope you all have a Merry Christmas and Happy New Year!!

And happy crafting all year long......


Monday, August 25, 2014

CHRISTMAS CORK DECORATIONS

DECORATING WITH CORKS!


CONTINUING MY SEARCH FOR CRAFTY WAYS TO USE CORKS, I SAW THIS GREAT PICTURE OF SOME CHRISTMAS DECORATIONS!
THESE CUTE LITTLE TREES WOULD LOOK PERFECT ON ONE OF MY TWO CHRISTMAS TREES THIS YEAR!

WHAT DO YOU THINK? LOOKS PRETTY SIMPLE...
 
IT LOOKS AS IF THE CORKS HAVE BEEN CUT IN HALF, THEN GLUED TOGETHER TO MAKE THE TREE SHAPE. THEN A SMALLER PIECE OF CORK IS ATTACHED TO MAKE THE BASE OF THE TREE.
I LIKE THE TWINE USED TO MAKE THE HANGER BUT I THINK YOU COULD USE ALMOST ANYTHING, MAYBE COLORED TWINE, STRING OR EVEN RAFFIA. IF I END UP MAKING SOME OF THESE I WILL SHOWCASE THEM IN MY BLOG CLOSER TO CHRISTMASTIME. I MAY EVEN TRY SEVERAL VARIATIONS FOR THE HANGER TO HELP ME DECIDE WHAT LOOKS BEST!

Tuesday, August 19, 2014

FUN WITH CORKS!!

CRAFTY THINGS YOU CAN DO WITH CORKS!

Over the years I have collected many, many wine corks, both from drinking and from friends and family. I put them in glass jars, etc. until I could figure out clever ways to use them.
Here are a few ideas I came up with to try to use wine corks...you've already seen my cork letters in a previous blog but I've been trying to use up my corks for awhile!!

WINE CORK KEYCHAINS


I have made and sold many of these and the possibilities are endless!! You can personalize the keychain with any type of charm. I've even made seasonal keychains with Christmas charms (those I sold very quickly)! The butterfly keychain was a sort of experiment. I used brass fittings to match the gold tone butterfly and painted a plain cork with gold craft paint...but I mostly like to use the silver tone charms because they are more readily available and less expensive!

CORK PLANT MARKERS using Sharpie marker

Another use for wine corks, plant markers! I have many plants in pots on my patio and have trouble keeping track of what they are! So, I wrote on a cork with a Sharpie, stuck two toothpicks on the underside of the cork and voila, instant markers! So far the weather has not affected the writing on my markers, likely thanks to the durability of the Sharpie ink!

WINE CORK TRIVET with Biltmore wine corks

Since I love going to the Biltmore in Asheville, North Carolina we have collected many corks from their famous wines! So, I made a large trivet using only Biltmore wine corks! This trivet was made from a "kit" I purchased, but you could make one of your own. I tried using picture frames, but they are not the right size if you want to keep the corks intact and refrain from having to cut them. 
As you can see, apparently the possibilities are endless! Be creative and have fun with corks!!

Wednesday, August 13, 2014

WINE CORK LETTER

WINE CORK LETTERS

I am on a roll with the alphabet!!
Decided to try getting rid of more wine corks with another craft project!
I bought a large letter A @ one of our local craft stores, Dee's Crafts. The letters are made of pressed board, are not as heavy OR as expensive as wood letters.

I've seen corks on letters before, but most of them are cut and that seemed like too much trouble! Besides, I wanted to use the entire cork and keep any lettering or design intact.
So, I glued the corks to the letter with hot glue, just applying glue to the ends of the corks...
I also made sure to use REAL corks, not the plastic kind that are sometimes being used.
I think it turned out great, and the best part is that the letter stands up on it's own!! Now on to make a few more...check back soon to see my progress and what I plan to do with the letters!

Sunday, August 10, 2014

ALPHABET BOOKENDS

Getting my blog on.....

I've noticed letters of the alphabet are very hot in decor and decorating right now, so I had an idea to use my own initials and my husband's to make a set of bookends....
My husband's name is Ron, so I purchased some unstained plain wood letters A and R  and two base plaques at Michaels.
I wanted a bright color but still like the grain of the wood to show through, so I used a neon green craft paint by Apple Barrel and lightly "washed" the wood, almost like a stain, as shown here....

With the help of my handyman husband we put adhesive felt on the bottoms of each plaque and then using wood screws as shown attached the A and R ....

The finished product looks very cool....
I plan to use them in a very dark wood corner cabinet, so that's why I chose the green stain, so the bookends would pop....


Love the fact that from any angle you see an A and an R!! And they are my initials as well!
Will post the bookends in the corner cabinet in a few weeks! 

Friday, August 8, 2014

UNIQUE HANDPOURED JAR CANDLES

UNIQUE CANDLES!!!

I've been getting my craft on this summer before starting my LAST semester working on my MSN!! YAY!

I had some half pint glass Mason jars and some left over blocks of beeswax and became inspired.

I decided to try to personalize the jar tops with some kind of decorative paper and tried a few with cut outs from some old Christmas cards....great Christmas candle idea. Like the one below....What a great way to repurpose old Christmas cards!!


I found another attractive design on a card and placed it in the jar top and it looks like this...

Now I am really inspired!! My niece has a birthday coming up and she has a beautiful border collie, so I downloaded a picture of her dog, printed it on some heavy cardstock and voila!! A very unique and personalized candle!

PICTURE FRAME BOW!

RAFFIA BOW DECORATION FOR PICTURE FRAME


On a recent trip to a local (and locally owned) craft store I overheard an employee talking about using ribbon to decorate a picture frame. She noted that the frames were "selling like hot cakes"! I never got to see what she had created because it was sold, but it got me thinking. 
What could I use to decorate or enhance a picture frame?
Chevron patterns seem to be very popular, especially in burlap. But I have an older looking frame with pictures of the home my husband grew up in, printed in black and white. So I decided to go for a more "country" look and used raffia and added a button for more flair!
I think it turned out very cute!!


I just wrapped the raffia around the back of the frame, much like you would wrap a present, tied off the bow and added a button to the center of the bow with wire.

More picture frame decorating ideas are coming soon :)

Tuesday, July 15, 2014

CRAFT ROOM TABLE!!


I stumbled upon this clever craft table on another amazing blog called All Things Heart and Home.....


The table top is made of wood laminate flooring!!
I have had my own craft table top made of formica, which is a laminate, and it is easy to clean and maintain.
This is another great idea.......so check out this great
site and get some inspiration!!

THE CHIC SITE!! TEACUP BIRDBATH PROJECT.....


Another great blog called
The Chic Site~!!


I stumbled upon this site on Facebook, found some great ideas, including an "Overnite Sweet Pickles" recipe!! YUM!
But the one I really liked and want to do one of these days is the Teacup Birdbath!! 
Looks really easy and simple!!


THECHICSITE.COM
CLICK THIS LINK......The Chic Site Blog

Monday, June 16, 2014

WINE CORK PLANT TAGS

WINE CORK PLANT TAGS!!

I have so many wine corks and I love finding ways to repurpose them.
So.... a couple of toothpicks and a permanent marker later,
instant plant tags!!

I have a lot of pots with many different plants and flowers and it's hard to remember what everything is. Instead of trying to keep the plastic tags that identify the plant, why not repurpose something else and be clever at the same time?
Plus, it didn't cost me anything extra!

The toothpicks go into real cork very easily. If you are trying to use the newer plastic corks you might have to use something to poke a hole in the cork before inserting the toothpicks. I'll let you know how they weather the elements.
Here is one of my cats, Coco Chanel, admiring my handiwork after I "tagged" our lovely purple delphinium. Hope I spelled it correctly! Our other cats aren't really too excited about the tags, they just like to nibble on the foliage, especially zinnias!

AIR FRESHENER: ALL NATURAL AND EASY TO MAKE!!

ALL NATURAL AIR FRESHENER

I can't take credit for this idea, I saw it on one of my newest favorite blogs called mom4real!!

You take a regular Mason jar (I just happened to have one handy). The original directions call for a smaller jar, but I just wanted to see how it went.....
Fill the jar with about 1/2 cup of regular baking soda, then add 15 to 20 drops of your favorite essential oil. I used an Anxiety Release oil from Wyndmere I just happen to have, but you could use citrus, lavender or any scent you prefer.
Gently mix the baking soda and oil......
The fun part was making the top....you take a piece of decorative craft paper or something with a design you like...
I used an old greeting card with nice color and flair....
Trace around the lid and cut out a circle and fit the paper inside the jar lid...
Then, using a pin, or in my case, a nail because the paper was very thick, poke holes in the paper to help release the scent...
And now you have a lovely, all natural air freshener that you can design to go with any decor!! 
Again, thanks to the original idea from www.mom4real.com

Saturday, June 14, 2014

PATRIOTIC AMERICAN FLAG PIN GIVEAWAY!!

ONE LUCKY PERSON WILL WIN ONE OF MY HANDCRAFTED, ONE OF A KIND
AMERICAN FLAG PINS!
ALL YOU HAVE TO DO IS SIGN UP TO RECEIVE POSTS FROM MY BLOG.
ON JULY 1ST A RANDOM DRAWING WILL BE HELD AND SOMEONE WILL WIN!!


GLASS PENDANT RIBBON NECKLACE

GLASS PENDANT

I spotted this beautiful glass pendant at a garden & craft show. The artist was going out of business and I only paid $1 for it!! Determined to do something fun with it, I took it home and this is the result....


I had some sheer copper ribbon, found some fittings at a craft store and made a gorgeous necklace!! 
My only regret was not being able to find gold fittings that would have complemented the piece.....
Still, what a find, a handmade blown glass pendant for only one dollar!!

Friday, June 6, 2014

UPDATE: SPRAY PAINTED FLOWER POTS

REMEMBER MY PAINTED FLOWER POTS?

I SEARCHED FOR JUST THE RIGHT COMBINATION OF PLANTS TO USE, GOING FOR A "THRILLER" (TALL PLANT), "FILLER", AND A "SPILLER" LOOK.

HERE'S ONE OF THEM AFTER IT REALLY GOT GOING:

This pot has a combination of the tall blue sage, pink snapdragons, yellow marigolds and white allysum (sweet smelling!), which will eventually become my "spiller" or trailing plant. More updates as my plants continue to keep growing, enjoying the journey!!!!!!!!

CRAFTY AMERICAN FLAG PIN!!

Showing my American pride with this cute flag pin!
It is made from foam board, painted with puffy paint and decorated with bling stars!

HOORAY FOR THE RED, WHITE AND BLUE!


THANK A VETERAN TODAY AND LET'S NOT FORGET ALL THE SACRIFICES THEY MADE AND STILL MAKE!

Tuesday, April 1, 2014

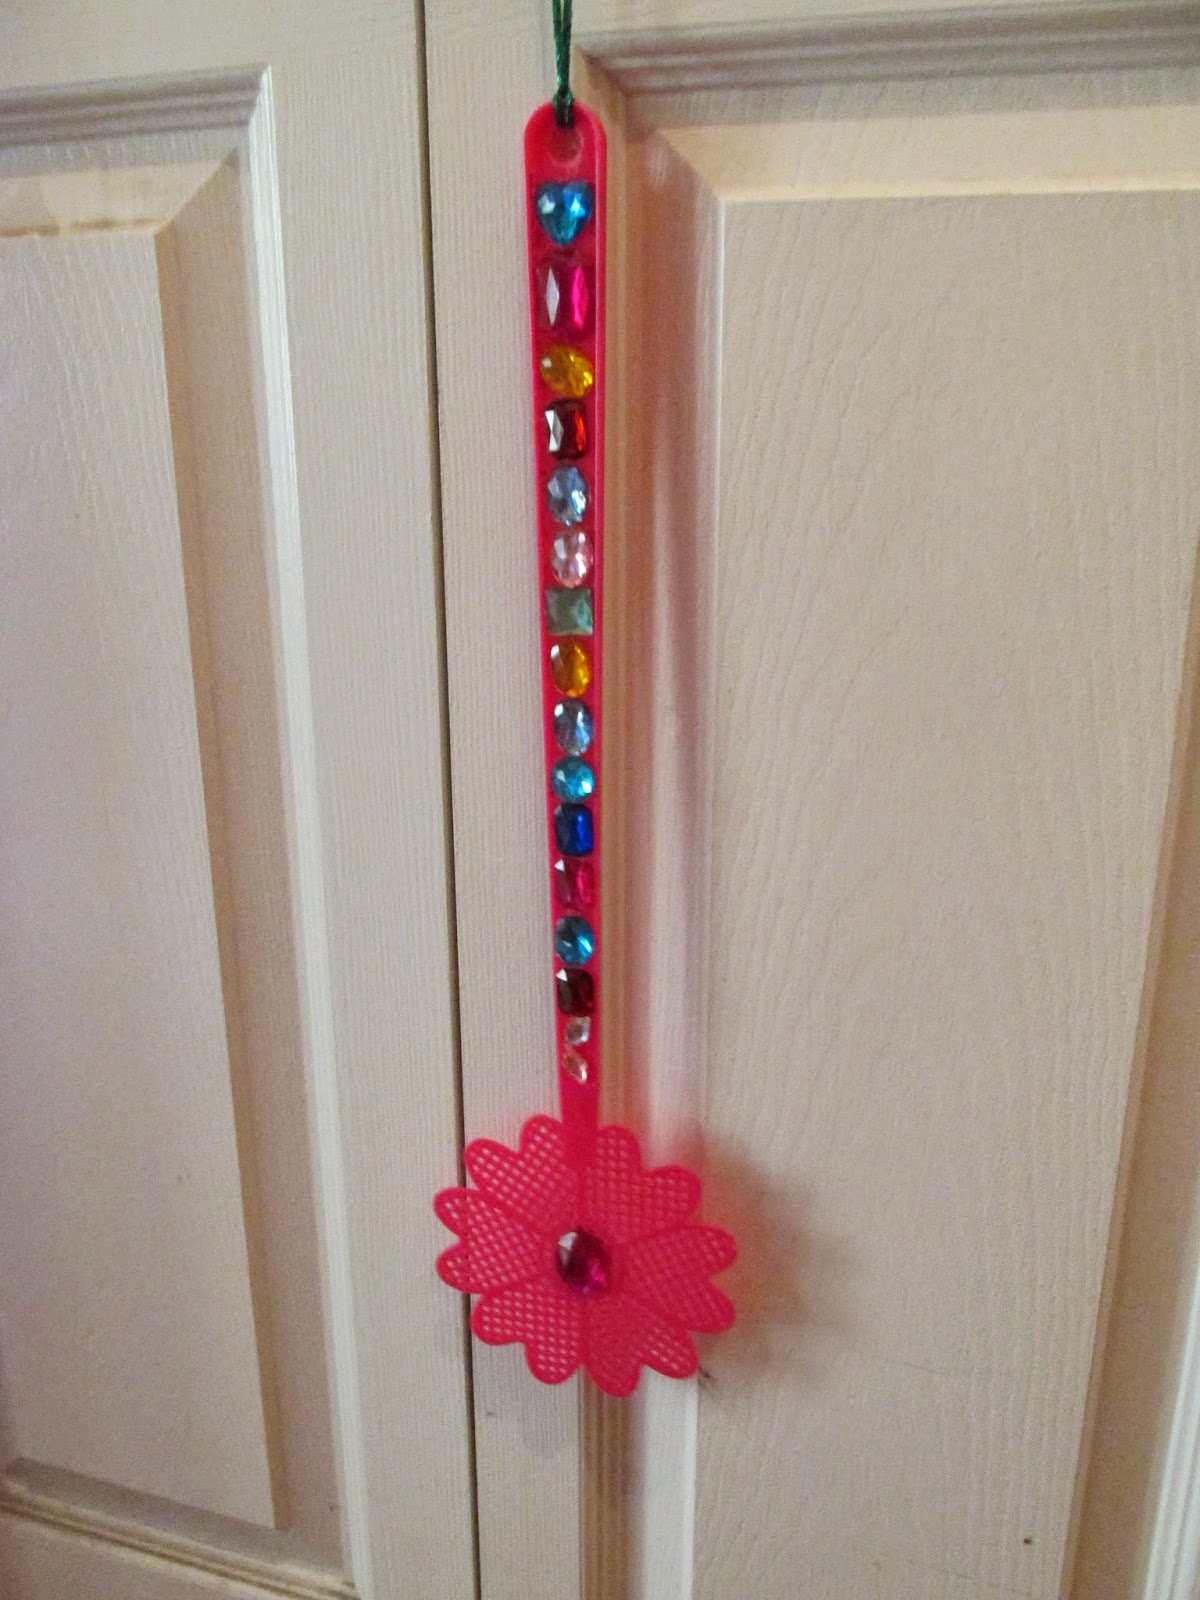
DIVA FLY SWATTER

Even a diva has to use a fly swatter every now
and then, so how about one with lots of bling!

Fly swatting doesn't have to be a chore with
this bright pink fly killer!


So, what do you think of my newest creation??
I took some left over bling crystals and applied them
to the swatter, easy peasey!

Monday, March 31, 2014

FLOWER POT MAKEOVER

FLOWER POT MAKEOVER!!


Spring is in the air, and we had a number of worn out looking
but still very nice light weight Styrofoam pots.

I had some left over spray craft paint in different colors and
I had an idea......why not just paint the pots and help them
last another year?

See how easy!!


Before picture of flower pot

We did this outside in the yard, just spray the pot and make sure you are up wind so you don't get paint on you!!
We used cardboard under the pot to protect the grass
Voila!! Two of our finished pots, we used craft spray paint in a moss green color, and also used antique white and brown. Now all we need to do is wait until it is warm enough to plant flowers!
Will keep you updated, after the threat of frost is gone, we will be filling our pots with lots of fun plants and flowers.

Wednesday, February 5, 2014

MORE CREATIVE CRAFT ROOMS!!

I found an awesome collection of more great looking and creative craft rooms, from another cool craft blog site @
eclecticallyvintage.com
Take a look.......

Don't you just love the old Greyhound bus sign on the wall?
Very vintage!!

click on this link to see more..... Creative Craft Rooms

Wednesday, January 8, 2014

MORE GREAT CRAFT ROOMS!!

Just want to share some more great looking craft rooms...I love the designs and colors that are 
incorporated into something so functional!!