Friday, December 28, 2012
Thursday, December 13, 2012
Wine Cork Keychain Tutorial
Step by Step Instructions: Wine Cork Keychain
You will need:
wine cork (real cork or plastic, both work well)
(2) flat washers (size #10, available at any home improvement or
hardware store)
(2) screw eyes (size #212, home improvement or hardware store)
(1) large split ring (24 mm)
(1) small split ring (12 mm)
charm, silver-tone of your choice (get at Michael's, Hobby Lobby)
clear hobby glue (such as E6000, etc.)
Step One
 |
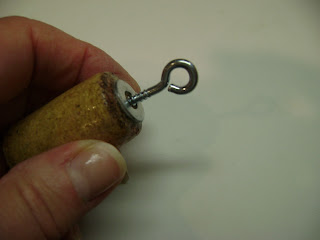
Glue washers to each end of cork, allow to dry.
Step Two
 |
After glue is dried, twist screw eyes as far as you can
into each end of cork through the hole in washers.
Hint: Apply a little glue to the threads of the screws to
help secure them and ensure they won't back out.
Step Three
 |
eye and small split ring to the other screw eye.
Step Four
Attach your charm of choice to the small split ring.
The large ring will be for your keys!
Voila!! Your keychain is done!
Here are some examples of great wine cork keychains I have made and sold. I try to match the charm with the
cork, for example, for a Turning Leaf wine cork I used a
leaf charm, and I found a cute fish charm for Fisheye wine!
Use your imagination and have fun!!
These make great stocking stuffers, secret Santa presents,
great for bunco or door prizes...
Wednesday, November 21, 2012
Bottle Cap Crafts
It's college basketball season!!
Got crafty with bottle caps!!
Made some earrings to wear when I watch my favorite team
the University of Louisville!
Now ranked #2 in the country!!
GO CARDS!!!!!!!\
Got crafty with bottle caps!!
Made some earrings to wear when I watch my favorite team
the University of Louisville!
Now ranked #2 in the country!!
GO CARDS!!!!!!!\
Saturday, September 15, 2012
SOLD!!
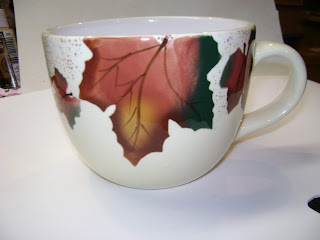
I added the finishing touches to my candle mug and SOLD it!!
I put copper glitter on the rim and a copper bow with fall leaves.
Didn't even have time to take a picture of my creation before I sold it!! WOOHOOO!!
I put copper glitter on the rim and a copper bow with fall leaves.
Didn't even have time to take a picture of my creation before I sold it!! WOOHOOO!!
Friday, September 7, 2012
Cappuccino Cream Coffee Mug Candle
My intuition kicked in after I began thinking of ways to enhance this great fall mug.
Instead of making a standard fall centerpiece, I wanted to make a more creative and functional craft.
So.... I love candles, and have so many partially used scented candles I light mostly during the holidays.
Instead of throwing them out, I melted them and poured them into this mug. Most of the candles were cinnamon or holiday scents. I saved the light brown "Cinnamon roll" candle for last and used it for the top layer.
Now I have a lovely candle that looks and smells like cinnamon-mocha flavored coffee!!
I am calling my new creation Cappuccino Cream.....
CAPPUCCINO CREAM CANDLE
But WAIT.....I'm not done yet!!
This would make a great hostess, birthday, any occasion gift.
I'm going to add a few enhancements to make it just perfect for giving.
Check back soon and see the finished product.....
Friday, August 31, 2012
Wednesday, August 29, 2012
Monday, August 27, 2012
Sunday, August 26, 2012
Bling Coaster How To
 |
| Repurpose old coasters or cut cork to desired size. Cover with glitter glue (gold works great!!) The glitter will even cover a design on an old coaster. |
 |
| Add plastic crystal bling to coaster. You can do this while the glitter glue is still tacky, or wait for the glue to dry and apply bling with more glitter glue. |
 |
| After glue dries, apply coat of some type of varnish or polyurethane. For this coaster I used Triple Thick gloss glaze by DecoArt. It goes on opaque but dries crystal clear! |
 |
| Use foam brush to apply varnish or glaze to help set bling gems and provide a smooth surface for your coaster. |
 |
| Allow varnish to dry and Voila!! you have a cool bling coaster!! CAUTION: Do NOT use as a trivet!!!! Heat may melt the plastic in the crystals!! |
Saturday, August 25, 2012
Wine Cork Crafts
I love choosing the charm to go with each cork.
Great examples: Turning Leaf cork has a leaf charm,
Fisheye cork has a fish!!
What a great way to recycle/upcycle!!
These make great hostess gifts and stocking stuffers!! I had 20 orders last Christmas for these!!
Found this great wire display stand at Goodwill!!!
Friday, August 24, 2012
Subscribe to:
Comments (Atom)


